Building a steam box!
I’ve had a design rolling around in my head for a thing which requires some curved sections. Initially I tried just heating and clamping lathe to a curve form with wood glue between them, but they really maintain an overwhelming desire to straighten out, so I figured it might be time to build a steaming box.
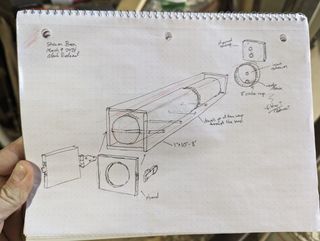
After a little research on youtube, I found a few different designs that seemed reasonable so I sketched up a diagram of my general plan. It’s always nice to have a roadmap to refer to during the creation process.
With a general idea of what would be required for materials, I set out to the hardware store and somehow spent about $150.
Materials (all prices USD)
| Item | Price |
|---|---|
| 725 Wagner Wallpaper Steamer | 64.98 |
| Titebond II Wood Glue 16oz | 6.48 |
| GE Big Gaps Foam | 3 @ 4.24 |
| Draw Hasp 4" Zinc | 6.99 |
| Light T-Hinge 3" 2Pk | 3.99 |
| Rubber Seal | 7.69 |
| 8" x 5’ Furnace Pipe | 2 @ 15.99 |
| 1x10⁻⁸’ Premium/Select Board | 4 @ 11.59 |
During my initial research I encountered a few mentions of the Rockler Steam Bending Kit but I couldn’t find any at my local hardware stores, and since I’m impatient and didn’t want to wait, I started looking around for other devices that might produce steam.
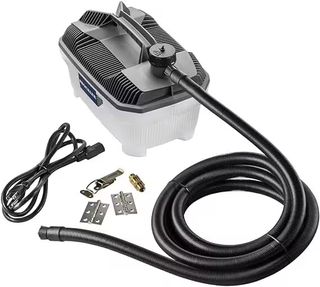
So, just for reference, here’s the Rockler Steam Bending Kit:
Then I happened upon the Wagner Wallpaper Steamer…
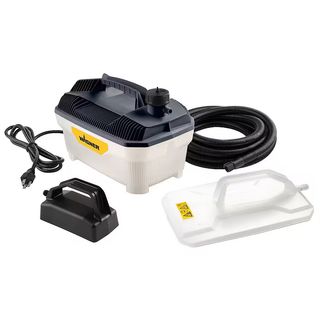
As you can probably see, these are obviously the same device except with different accessories. The wallpaper steamer was like $10 cheaper too, probably due to coming with a vacuum formed steamer plate rather than hinges, a clasp, and a little bushing thing. Of course I ended up buying the clasp and hinge and probably spent $5 more in the end, but I didn’t have to wait for shipping, so whatever.
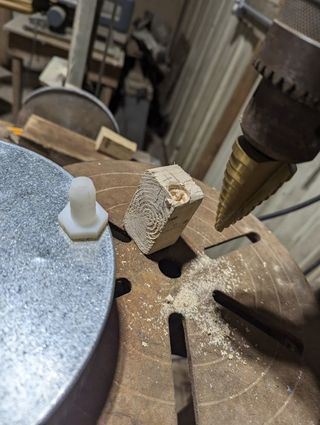
Drilling holes in the end cap was pretty simple. I used a step bit in the drill press until the pieces fit happily in the holes.
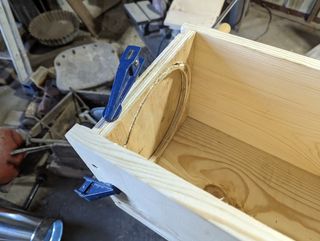
On the end of the box that will have the door, I cut a circle in the plywood that was a bit smaller than the 8" furnace pipe, then I used a router to make a little inset ring for the furnace pipe edge to rest inside.
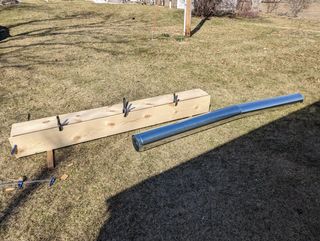
Since I had two 5’ furnace pipe segments and 8’ long boards, I placed the pipe inside the box and got a general idea of how much I would need to trim off. I ended up flipping the cut pipe around so the original square end would be at the end and the cut end joined to the other pipe, which I then wrapped in aluminum tape.

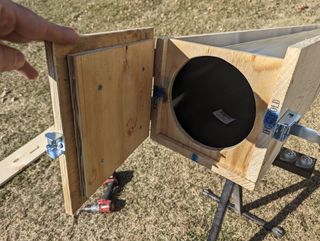
After ensuring everything fit, I cut a couple plywood squares which I then glued and screwed together for the door. I’m not sure screwing the clasp catch into the side of the plywood will be sufficient but I can always make another door if it doesn’t work out.
After everything was determined to fit together, the insulation foam was squirt into the cavities between the furnace pipe and the wood box.
The original design was to drill holes at regular intervals along the length of the box. Drilling through the furnace pipe before inserting it into the box would have been a real nightmare as far as lining everything back up during assembly. The other option was to drill after assembly, but that would have likely led to the drill bit tracking around on the furnace pipe since it would be coming in at a weird angle.

Dad suggested making an insertable rack. He presented a handful of ideas: use a section of electrical conduit, or rolling some wire mesh into a little thing. I was skeptical of using wood for fear it would warp or curl up after a bit of use, but it was a non-destructive solution, so there was no loss in trying, especially if it was made out of scrap wood.

Seems to fit fine, and looks nice. We’ll see how it works once the foam has time to cure.